




How to Anchor a Dresser to the Wall Safely
Nobody plans a tip over. It's usually something small, like a kid using the bottom drawer as a step stool, or three drawers left hanging open while you put laundry away, and suddenly a dresser you thought was rock solid is leaning toward you. It isn't a big project, just one short strap between the top of the dresser and a stud in the wall, and if there's a drill and a stud finder somewhere in your house, you're most of the way there.
Quick answer: one metal bracket goes into a wall stud, a second one goes into the solid top rail of the dresser, and the strap or cable from the kit ties them together, pulled snug. If there isn't a stud where you need one, you'd use a metal toggle anchor rated for the load, and the little plastic plugs from a picture hanging kit won't do the job.
Why Every Dresser Needs an Anchor

CPSC's Anchor It campaign puts the number at about 17,800 people injured by tip overs every year, and kids under 18 make up 44 percent of them. It's easy to assume TVs cause most of that. They don't. Furniture, it turns out, was involved in 82 percent of the injuries CPSC counted between 2020 and 2022.
Things changed in 2023, at least for new furniture. Under the federal clothing storage unit rule, any dresser made after September 1, 2023 that's at least 27 inches tall, weighs 30 pounds or more and holds at least 3.2 cubic feet has to pass stability tests and come with an anti tip device in the box. Newer dressers are harder to tip as a result. You should still use the strap.
What the Anti Tip Kit Contains
New dressers come with an anti tip device, and the Anchor It safety center says to install it right away. If you're browsing dressers with anti tip kits, check that the restraint is in the parts list and find out when the dresser was made. Before you build anything, open the hardware bag and lay the pieces out. Most kits look something like this:
|
Part |
Its job |
What to check |
|
Wall bracket |
Screws flat against the wall |
Metal, with a hole that fits the supplied screw |
|
Furniture bracket |
Screws to the dresser frame |
Goes into the solid top rail, never the back panel |
|
Strap or cable |
Joins the two brackets |
Nylon webbing or steel cable, not a plastic zip tie |
|
Wall screws |
Hold the wall bracket |
About 2 inches long to reach a stud through drywall |
The one part we'd question is plastic. In January 2024, millions of plastic zip tie restraints that had shipped with furniture from 31 companies were recalled, and Consumer Reports told owners to swap them for metal brackets with nylon straps or wire cables.
ASTM F3096, the standard these kits have to meet, tests how strong the restraint itself is, and that's it, so the wall side is up to you.
How to Find a Stud Behind the Dresser

You'll find studs 16 inches apart in most houses, measured center to center, and even older homes rarely go past 24 inches. Each one is only about an inch and a half wide, so it pays to find the middle.
• We usually start with the stud finder held about 30 inches off the floor, since that's roughly where the strap goes on most dressers, and mark both edges of anything it picks up.
• Outlets help too, since every electrical box gets fastened to a stud on at least one side.
• A thin finish nail tapped in behind where the dresser will sit settles any doubt, since you'll feel it hit wood.
Step by Step: Anchoring the Dresser

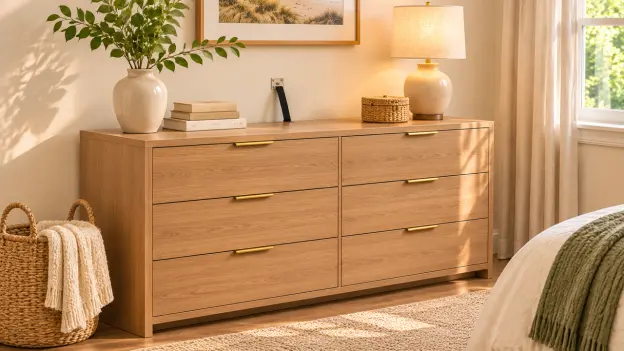
Build the dresser first and leave the drawers empty while you work. Our Savanna 6 drawer dresser weighs 112 lb once it's assembled and stands 31.34 inches tall, so you'll want two people to slide it around. SICOTAS lists a power drill as the one tool you need that isn't in the box, and you'll use it again here, along with a stud finder, a pencil and a tape measure.
1. Push the dresser into place and pencil a mark on the wall where the top rail sits, then pull it out a foot so you can get behind it.
2. The furniture bracket goes on the solid top rail, unless your manual shows a different spot, in which case go with the manual.
3. Hold the wall bracket at that same height over the middle of the stud, drill a small pilot hole, and screw it on flat.
4. Ease the dresser back toward the wall. A little gap is fine and actually helps, since baseboard trim can make a dresser rock if it's jammed in tight.
5. Feed the strap through both brackets and take up the slack until it's snug. Don't crank on it, because pulling too hard can lean the dresser out of level.
6. Last, give the top a gentle push. A fraction of an inch of movement and then nothing is what you're looking for.
Back panel warning: the back of most dressers is only a thin sheet of fiberboard tacked on with small nails. Screw a bracket into that alone and it can pull straight through the first time the dresser leans, which is why the frame is where it belongs.
With a wide dresser you've got room for two straps. Ours are about 57 inches across, so on a standard 16 inch stud layout either Savanna model covers at least three studs, and we'd put a strap near each end.
Which Wall Hardware to Use

Check what's behind the dresser first, then match the hardware to it.
|
Wall behind the dresser |
Use |
Watch for |
|
Drywall over wood studs |
Wood screw into the stud |
The strongest option. Drill a pilot hole first. |
|
Drywall, no stud in reach |
Metal toggle or snap toggle rated for the load |
Shift the dresser to catch a stud when you can. |
|
Drywall over metal studs |
Toggle or screw made for metal studs |
Standard wood screws strip in thin steel. |
|
Plaster and lath |
Long screw into the stud, low drill speed |
Plaster cracks if you rush or hammer. |
|
Brick, block or concrete |
Masonry screw or sleeve anchor, masonry bit |
A hammer drill helps. Renters should ask first. |
Anchoring a Dresser in a Rental

Two small screw holes behind a dresser take about a minute to fill with spackle when you move out. Still, email your landlord before you drill and mention that it's for tip over safety, because a written yes makes the deposit conversation much easier later. Our guide to choosing a dresser for a rental goes deeper on moving, assembly and lease questions.
Check the Anchor After Setup
Load the dresser from the bottom up, with heavy jeans and sweaters low and lighter things higher. That's one reason we like the layout of the Savanna 7 drawer dresser. Socks and odds and ends go in the three small drawers on top, and there are four bigger drawers underneath for anything heavy.
Look at the strap again whenever the dresser gets moved or the room gets painted, and after anything knocks into it hard. A lot of straps get unhooked for vacuuming and then just stay that way for months. Frayed straps and bent brackets should be replaced, not adjusted.
Final Thoughts
Anchoring a dresser takes less time than building one. Whether it's storage furniture from SICOTAS or a piece from another brand, do it the same day you put it together, before the drawers fill up, and give the strap a quick look once or twice a year.
FAQs
How Do You Anchor a Dresser to a Wall Without Drilling?
Not in a way we'd trust. Adhesive strips and no drill kits rely on paint and glue, and when a dresser starts to tip, the top pulls straight out from the wall, which is exactly the kind of force adhesive handles worst. The kits that ship with dressers are made to be screwed in for that reason.
Until your landlord says yes, a corner spot helps, with the heaviest clothes in the bottom drawers and nothing tempting on top. Ask in writing, because two small screw holes are an easy patch at move out, and plenty of landlords agree once they hear it's about safety.
What Is the Best Way to Securely Anchor Furniture to the Wall?
Our answer is a metal bracket in a wood stud, tied to the furniture with a nylon strap or steel cable. The pull goes into the framing behind the wall that way, instead of into half an inch of drywall.
On the dresser side, fasten into the solid top rail rather than the back panel, and keep the strap short with very little slack. Wide pieces get two straps. Start with the kit in the box, since covered kits are tested to ASTM F3096.
If you find a plastic zip tie restraint on an older piece, replace it. Consumer Reports recommended metal hardware after the 2024 recall.
What Can I Use If I Don't Have a Wall Anchor?
A wood screw into a stud, as long as there's a stud where the strap needs to go, and then you can forget about anchors entirely. You'd only need one for hollow drywall, plaster with nothing behind it, or brick and concrete.
Metal toggle bolts or snap toggles are what we'd pick for hollow drywall, after checking the rating printed on the package. For brick or concrete, you'll need masonry screws or sleeve anchors and a masonry bit to match.
We'd skip the plastic expansion plugs that come with picture hanging kits, since they're sized for light, steady weight and not a dresser leaning forward.
How Do I Make a Homemade Wall Anchor?
We wouldn't. Wooden dowels, cut down wall plugs and wire wrapped around a screw have never been tested, so nobody can tell you when they'll let go. A falling dresser yanks hard and all at once on the top fastener, which is the moment a homemade part is most likely to give.
If you've lost the hardware from the box, the furniture maker can usually send a replacement, or you can buy a kit that says it meets ASTM F3096. And if it's the wall that's the problem, a toggle or masonry anchor rated for the load on the package will sort it out.
Are There Screws That Don't Need Anchors?
Yes, any screw going into a wood stud. The threads bite into solid lumber, so a plug or sleeve wouldn't add anything.
The screw from the kit is the one to use. If you need a replacement, pick a wood screw about 2 inches long, which gets through half inch drywall and well into the stud, and drill a pilot hole a little narrower than the screw so the wood doesn't split. Masonry screws work without a plug too. They cut their own threads in a hole drilled into brick or concrete with a masonry bit.
Self drilling drywall anchors are the ones people mix up, because they're anchors, not screws, and they only hold in hollow wall.
How Much Weight Can Wall Anchors Hold?
Each package lists its own rating, and the number shifts with the wall and which way the load pulls. You'll usually see two figures, shear for weight hanging straight down and pull out for force pulling away from the wall.
A tipping dresser creates pull out force at the top bracket, and that's the direction hollow wall anchors are weakest in.
If you do have to use a hollow wall anchor, go with a metal toggle and check its pull out rating against what the kit instructions ask for. With a 112 lb dresser like ours, we'd still go looking for the stud.
How Can I Secure Furniture to the Wall to Prevent Child Injuries?
Anchor every piece a child could climb, not just the tallest one. In the CPSC figures behind Anchor It, children made up 71 percent of the deaths tied to TV and furniture tip overs.
Use the kit that came with each dresser, bookcase and wardrobe, keep heavy things in the lowest drawers, and keep toys and remotes off the top so there's nothing up there worth climbing for. Drawer locks help, but on their own they won't stop a tip over. Our kids dresser safety guide covers locks and the STURDY rule.
Check each strap a few times a year, too. Kids grow and rooms get rearranged.


Looking for something else?

How to Choose a Bookcase for Plants Without Damaging the Shelves
LEARN MORE
How to Choose a Bookcase for Board Games: Shelf Depth, Height, and Access
LEARN MORE
7 Best Narrow Nightstands for Small Bedrooms With Real Storage
LEARN MORE
Chest of Drawers vs Dresser: Key Differences and Which One to Choose
LEARN MORELooking for something else?
Narrow Shoe Cabinet Buying Guide: Depth, Sizes and Styles That Fit a Small Entryway
LEARN MORE
11 Best Mid-Century Modern TV Stands for Style and Real Storage
LEARN MORE
Mid Century Sideboard Guide: How to Choose the Right Size, Wood and Style
LEARN MORE


Further reading

Zen Bedroom Ideas for a Calmer Room

Sage Green Bedroom Ideas and Furniture That Suits It


