













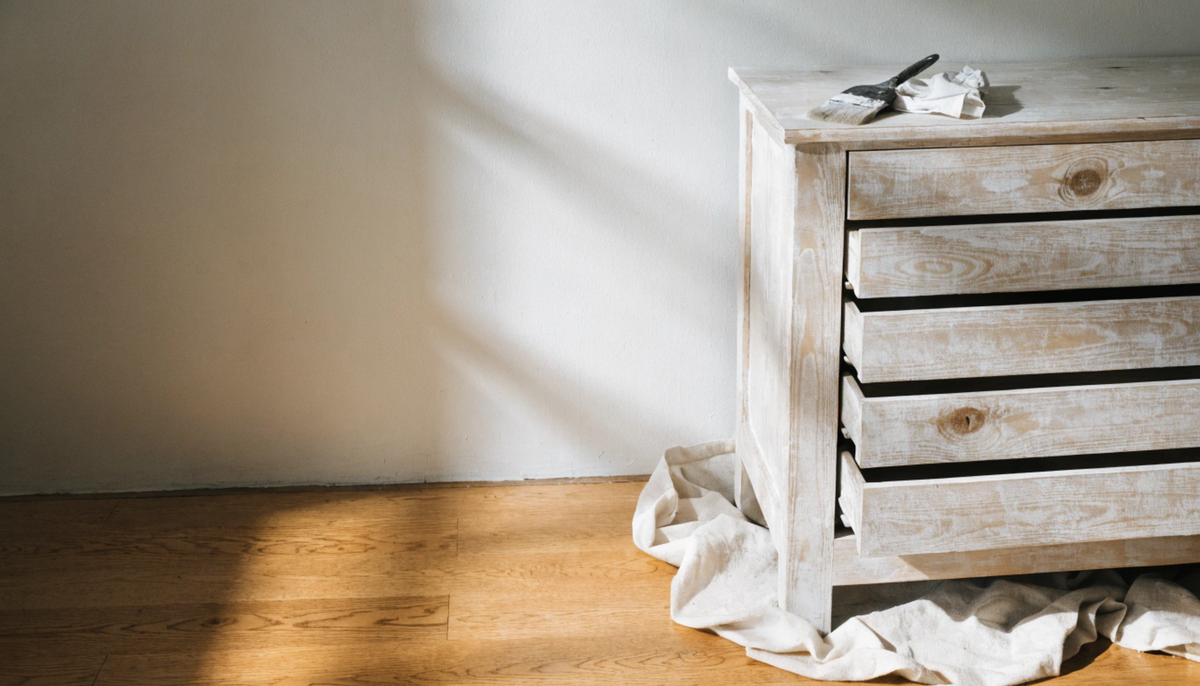

Whitewashed Wood Furniture: Getting the Finish Right at Home
Whitewashed wood furniture lands halfway between painted and bare. Thin some paint with water. Brush it on. Wipe part of it back off. The result is wood that still looks like wood, minus the orange.
Active work fits into an afternoon. The schedule does not. Between the stages sit waiting periods that no amount of enthusiasm shortens.
- Prep. Clean, make repairs, then scuff and sand. The Forest Products Laboratory recommends 50 to 80 grit here. It improves the bond and extends service life. Filler carries its own drying time.
- Test patch. Apply the mix in a hidden area and let it dry completely. Wet limewash and dry limewash are different colors. Judging from wet is how patchy finishes happen.
- Seal knots. Knots bleed oils and resins that come through light finishes. FPL calls for sealing them with shellac before anything else goes over them.
- Primer. FPL allows 24 to 48 hours after a stain-blocking latex primer before applying the topcoat. Rushing that window lets extractives bleed up through the color.
- Coats. Apply the second inside the recoat window on the label. FPL warns that coats spaced more than two weeks apart can peel between layers.
- Cure. Dry to touch, ready to recoat, and fully cured are three separate points in time.
Those intervals come from exterior paint systems. Limewash and whitewash products set their own, and the label is the authority on yours.
Temperature moves the whole schedule. FPL puts the floor for latex application at 50 degrees Fahrenheit and warns against letting it drop below that for 24 hours afterward. Cold gives you poor film formation and early failure.
Making it look deliberate instead of patchy traces back to the mix or whatever sits underneath.The Forest Products Laboratory chapter on wood finishing covers more of that than any ratio will.
The chart sits below, along with the full method and the bits other guides leave out.
Where Whitewash Sits Between Paint and Bare Wood

Whitewash is water-based paint carrying enough water to go see-through. It drops into the grain and the low spots. Raised wood keeps peeking out. That gap is the whole difference between this and a paint job.
Why It Is Not Just White Paint
Paint covers. It hides the lot. Whitewash keeps the surface underneath doing something. Knots, saw marks, old dents, grain lines. They all stay in the picture when you are done.
Whitewash, Limewash and Pickling Are Not the Same

People swap these words around as though they mean one thing. They do not.
- Whitewash is water-based paint let down with water. This guide uses that method.
- Limewash means slaked lime and water. A mineral finish that cures by carbonation, and it belongs on porous masonry more than on furniture.
- Pickling is a white or grey stain that sinks into open-grain wood. Oak takes it well.
- Liming wax gets rubbed into open pores. No water anywhere in that one
Substrate decides whether limewash works at all. It grips porous mineral surfaces such as brick, lime plaster and bare masonry, where it carbonates into the surface. Sealed wood, laminate and factory-finished panels give it nothing to bond to.
Hazard language comes from the safety data sheet for the product in hand.One manufacturer's hydrated lime SDS carries the pattern these sheets share: skin irritation, serious eye damage and possible respiratory irritation, under the signal word Danger.
Classifications vary between products. Some sheets list the material as skin corrosive rather than irritant. Others add a cancer statement tied to crystalline silica present as an impurity. Read section 2 and section 8 of the sheet for the product you buy.
Section 8 lists the protection. Gloves, eye protection, and face protection appear across these sheets, along with instructions to avoid breathing the dust and to work in a well-ventilated area. Wet lime left on skin does more damage than a quick splash suggests.
Nearly every guide out there muddles at least two. Sort out which one you actually want before you buy anything.
Supplies to Gather

- Water-based paint, white or off-white. Latex paint and chalk paint both work.
- Water. Any container you can stir in
- One brush that suits the piece, and a small one for grooves and turned legs.
- Lint-free rags, more of them than you think
- Sandpaper: 120 grit and 220 grit
- Something that cuts grease, plus a drop cloth
- A topcoat if the piece needs one. Water-based clear or clear wax
Latex paint sits on every hardware shelf and thins nicely. Chalk paint grabs quicker and dries dead matte. Off-white ages a piece. Bright white keeps it crisp. Stuck between them? Brush a little of each onto scrap.
Sorting Out the Whitewash Paint Ratio

One guide swears by 1:1. The next insists on 3:1 water to paint. Neither is lying. The variables are the wood underneath and how much grain you want left showing.
|
Paint to water |
How it looks |
Use it on |
|
1 part paint to 3 parts water |
Ghost of a coat. All the grain shows |
Raw pine or oak you just want knocked back |
|
1 part paint to 2 parts water |
Soft, still see-through |
Most raw wood, or a light scuff sand |
|
1 part paint to 1 part water |
Proper whitewash. Grain still reads |
Stained or darker timber. Start here if unsure |
|
2 parts paint to 1 part water |
Almost solid. Grain only in deep pores |
Very dark wood. Also a heavier farmhouse look |
Mix a small batch. Try it on the back of the piece where nobody looks. Wet whitewash always reads darker than dry whitewash. Judge it wet, and you will get it wrong.
Safety Checks Before You Sand

Thrifted and hand-me-down pieces need one check before anything else. The federal consumer ban on lead-containing paint took effect in 1978. It stopped new sales. It did nothing to the coatings already on furniture, and a piece older than that may still carry them.
Furniture is harder to date than a house.EPA's guidance for do-it-yourselfers says that where age cannot be determined, the safe move is to assume lead-based paint is present and work accordingly.
Test before the sander comes out. EPA recommends a certified lead inspector or risk assessor for that determination. Consumer test kits exist and carry limits worth knowing before you rely on one.
Avoid dry sanding. EPA's dust control list points to wet-dry sandpaper, a mister to damp the surface before sanding, and a HEPA vacuum. Power tools need HEPA vacuum attachments. A heat gun stays under 1,100°F.
Protection matters as much as technique. EPA lists a disposable N-100 respirator, disposable coveralls and shoe covers, plus eye protection and gloves. Wash hands and face at every break. Keep work clothes out of the family laundry.
Most whitewashing guides skip this and point you straight at a power sander. Working outdoors on a dropcloth handles the containment problem that indoor work creates.
Older than 1978? Test the paint first. Health agencies point to wet sanding and proper protective equipment over dry power sanding. Keep children and pets well away while you work.
Plain wood dust matters too.OSHA's hazard summary describes it as an irritant to the eyes, nose, and throat; a cause of pulmonary function impairment; and a human carcinogen. The NTP lists it as a known human carcinogen, and IARC places it in Group 1.
Those rules govern workplaces, not a homeowner's garage. Biology doesn't care about that distinction.
Open a window, and you have dilution. Dilution is not capture. The dust that matters is the plume in front of your face at the tool, and a window across the room does nothing about it before you breathe it.
Source capture is the control that works. A sander with a dust port connected to a vacuum takes most of it before it reaches the air. Wet sanding or misting the surface first cuts the rest, where the finish allows it.
For respiratory protection, a NIOSH-approved N95 filtering facepiece is the floor, not a dust mask off the paint aisle. It only works if it seals. Facial hair breaks that seal, and a cloth or surgical mask does nothing here.
Cleanup puts more dust in the air than sanding does when it goes wrong. Vacuum with a HEPA filter. Never dry sweep and never use compressed air. Both send settled dust back into the air. Wipe down with a damp cloth afterward.
Two extras ride along with the dust. Mold and fungi growing on the wood contribute their own effects, and processed lumber can carry formaldehyde, copper naphthenate, or pentachlorophenol. Fine dust piles are also a fire hazard.
Outdoors handles most of this at once. Working outside removes the containment problem, the cleanup problem, and the ventilation argument in one move.
Whitewash Wood Furniture: The Actual Steps
1. Clean the Piece Properly
Grease and old polish block the wash. Go over the whole thing with a degreaser and let it dry. While you are there, hunt for tape residue, wax buildup, and any sticky patch you would otherwise paint straight over.
2. Sand or Scuff the Surface

Bare wood wants 120 grit and then 220. Varnish and lacquer need more than a scuff. Break the film properly, or the wash will bead on top and come away with the rag.
Sand with the grain. Scratches running across it turn ugly the moment a pale wash settles into them.
3. Deal With Raised Grain
Water swells the fibers and stands them up. On raw timber, wipe the surface with a damp cloth, let it dry, then knock it back with 220 grit. That happens before the first coat, not after.
Surface prep drives how any wood finish performs. Skip this one and the piece feels like sandpaper when you run a hand over it.
4. Mix and Test
Begin at 1:1, then move up or down the chart. Try it on a hidden panel or a scrap offcut. Let it dry completely before you decide.
5. Brush On, Working Small

Cover one drawer front, one panel, or one leg at a time. Chalk paint especially will skin over in minutes. Brushing with the grain gives a more natural result.
6. Wipe Back the Excess
Drag a lint-free rag along the grain. More wiping means more wood showing. Less wiping means a whiter surface. If the wash dried before you got there, mist it with water and try again.
7. Blend the Edges
Feather each section into the next while both are still wet. Hard stop lines are the most common reason a whitewash looks amateurish.
8. Add Coats Slowly
Two thin coats beat one heavy one. Stop when the grain starts disappearing. Past that point you have painted the furniture rather than whitewashed it.
Whitewashing Veneer, Laminate and Engineered Wood

Most furniture sold today is not solid timber. It is veneer over engineered board, or a printed laminate. Every competing guide ignores this, which is a problem, because the technique changes.
Real Wood Veneer
A thin sheet of real wood over a core. It takes whitewash fine, but the veneer may be under a millimeter thick. Sand gently by hand and stop the moment you see the core color appear.
Laminate and Melamine
A printed surface with no grain to soak anything up. Whitewash will not absorb at all. You need a bonding primer first, and at that point you are painting rather than whitewashing.
Engineered Board Edges
Cut edges drink water and swell. Keep the wash off exposed edges and never soak them. Seal any edge that has already fuzzed before you continue.
Which Pieces Take a Whitewash Best
Dressers and Chests of Drawers

Wide drawer fronts show the grain beautifully, and a light finish cuts the visual weight of a big chest. If the project is not worth the weekend, a seven-drawer chest already finished in soft white gets you there without the sanding.
Chairs, Benches and Turned Legs
Turned legs, spindles and carved trim are where whitewash shines. The wash collects in the recesses and throws the shape into relief. Use a small brush and wipe the raised areas harder.
Nightstands and Small Side Tables

Small pieces are the right place to learn. One drawer front, low stakes, quick to redo. For a matching pair without the work, a white bedside table with drawers and a shelf covers the same look.
Sideboards and Buffet Cabinets

Long flat doors are unforgiving, since stop lines show up across a wide panel. Work fast and keep a wet edge. A fluted white buffet cabinet gives a similar bright look with texture built into the doors.
Entryway and Shoe Storage

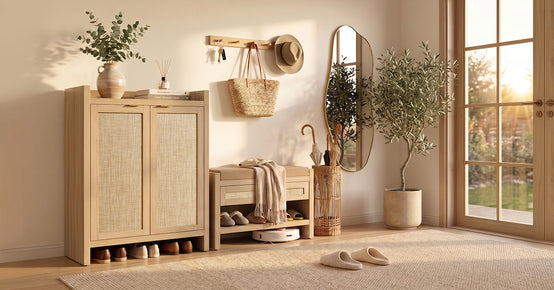
Hallway pieces take knocks, so seal anything you whitewash here. A white shoe cabinet with three doors is the low-effort route if the piece will meet wet boots all winter.
Getting the Look You Want
Coastal and Farmhouse

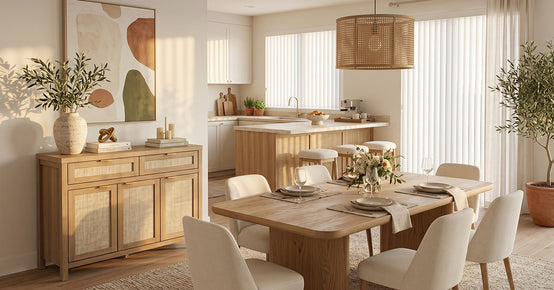
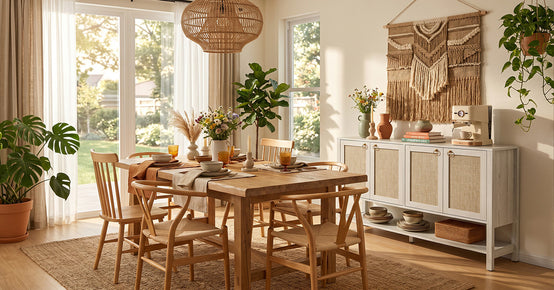
Thin wash, heavy wiping, off-white rather than bright white. Let the grain carry the look. Dining rooms suit this treatment particularly well, and the dining room collection shows how a pale finish reads across a table and buffet together.
Entryways and Hallways

Pale finishes bounce light around a dark hallway, which is where most entries need help. Whitewash a bench and leave the wood grain showing, or pull a matching set from the entryway storage range instead.
Rustic and Weathered
Let the coverage vary on purpose. Leave more wash in the joints, edges, and dents. Sand a few high spots back after everything dries.
Soft Modern
Use even strokes, consistent pressure, and one or two controlled coats. Skip the distressing entirely. This version stays out of farmhouse cliché territory.
Problems and Fixes

- Streaky and thick means too much paint in the mix. Add water and go again, thinner.
- Barely showing up? Too much water. Add paint back a spoonful at a time
- If it wiped off completely, the old varnish is still doing its job. Sand further
- Yellow or pink patches are tannin pushing through. Pine, oak and mahogany all do it. Spot-prime with a stain blocker
- Rough to the touch is raised grain. Light pass with 220 grit, then one thin coat
- Hard lines between sections mean you took on too much at once. Blend the next one while it is wet
- Blotchy on pine happens because pine drinks unevenly. A thinned clear sealer first evens things out
Sealing Whitewashed Furniture

On its own, a wash protects almost nothing. Whether you seal depends on how you use the piece.
- Tabletops, desks, and anything you eat off want a water-based clear coat such as polycrylic, one that will not yellow.
- Dressers, headboards, and display pieces do fine with clear wax. It feels better under the hand too.o
- Seal entryway and kids' furniture. No exceptions
Go matte or satin. Gloss undoes the soft look you just spent an afternoon on. Test the topcoat somewhere hidden first. A few clear finishes warm the white by a shade.
Final Takeaway
Whitewashing earns its place by shifting the color without wiping out the wood. Prep settles most of the result. The ratio handles what is left.
Test somewhere hidden. Build up in thin coats. Stop while the grain still reads. Seal whatever gets handled every day.
FAQs
What is whitewashed wood?
Whitewashed wood is timber carrying a thinned coat of light paint that still lets the grain through. It sits between bare wood and painted furniture. The old versions used lime and water. Most furniture projects today use water-based paint thinned with water.
How do you whitewash wooden furniture?
Short version:
- Clean it and get the grease off
- Sand bare wood smooth. On varnish, sand until you break the film
- Mix water-based paint with water, then test it
- Brush along the grain, small sections at a time
- Wipe back with a lint-free rag
- Let it dry. Add a second thin coat if it needs one
Seal it afterward if the piece will get regular use.
What does whitewash wood look like?
Pale and a little uneven, with grain and knots still readable underneath. White gathers in the low spots and thins out across raised areas. Softer than solid paint to look at. No two pieces ever come out the same.
Is whitewash furniture in style?
Whitewashed wood furniture still works in coastal, farmhouse, Scandinavian, and relaxed modern rooms. It lifts a space without losing the natural texture. It dates when it's heavily distressed and paired with a room that commits hard to one theme. Keep the wash restrained and the shapes simple, and it reads current.
What are the benefits of whitewashing wood?
Mainly these:
- Lifts dark or orange-toned timber
- Wood grain stays visible
- Costs a fraction of replacing the piece
- Settles into small dents and scratches, which hides them
- You control exactly how heavy the finish looks
It forgives mistakes too, which makes it a fair first furniture project.
What is whitewash made of?
Traditional whitewash is slaked lime mixed with water. Salt or chalk sometimes went in, too. Furniture projects now use thin, water-based paint instead. Latex, acrylic, and chalk-style all work—two different products sharing one name.
Why is it called a whitewash?
The name comes from the original method. People washed a surface with a thin white lime coating rather than painting it. Barns, cottages and walls got the treatment for centuries because lime cost little and held off mold. The word outlived the recipe.
How do I whitewash my furniture?
First, work out what the surface actually is. Raw wood, varnished wood and laminate each behave differently. Clean and sand to suit.
Mix a test batch at one part paint to one part water. Brush along the grain in small sections. Wipe back until it looks right, then build up slowly.
Sources
- U.S. Environmental Protection Agency – Lead-Safe Renovations for DIYers
- New York State Department of Health – Lead-Safe Renovation, Repair, and Painting
- USDA Forest Products Laboratory – Finishing of Wood, Wood Handbook Chapter 15
- USDA Forest Service – Wood Handbook: Wood as an Engineering Material
- Occupational Safety and Health Administration – Wood Dust: Hazard Recognition
- National Institute for Occupational Safety and Health – Wood Dust Health Effects
- National Center for Biotechnology Information – Wood Dust, IARC Monographs


Looking for something else?

Burl Wood Furniture: The Complete Buying Guide
LEARN MORE
What Is a Hope Chest? Meaning, History, and Modern Uses
LEARN MORE
What Is a Foyer? Meaning, Purpose and Design Guide
LEARN MORE
GREENGUARD Gold Certified Furniture: What It Really Means for Your Home
LEARN MORELooking for something else?

How to Clean a Mirror Without Streaks: Simple Step-by-Step Guide
LEARN MORE
21 Above-Bed Decor Ideas for a Stylish Bedroom Wall
LEARN MORE
Furniture Materials Guide: Picking the Right Material Room by Room
LEARN MORE


Further reading

18 Decorative Storage Box Ideas That Hide Clutter Well

How to Store Comforters Without Losing Space or Loft


