















How to Clean Wood Furniture and Keep the Finish Intact
Learning how to clean wood furniture gets easier once you accept one thing. You're not cleaning the wood. You are cleaning the coating sitting on top of it, and that coating calls every shot.
Get that right, and a damp cloth handles most jobs. Get it wrong, and one pass leaves a surface dull for good. Conservators publish free guidance on caring for furniture because the wrong bottle can do damage nobody can undo.
Work out what you have first. The safe method follows from there.
Work Out the Finish Before You Touch Anything
For routine cleaning of an intact surface, the finish is the interface. That is the useful part of the idea, and it stops there.
No finish is a barrier. FPL puts it plainly: no coating is entirely moisture-proof, and an effective one slows absorption rather than stopping it. The timber underneath is still in play.
Species reappears the moment water and metal meet. FPL notes that iron deposits react with water-soluble extractives in oaks to produce dark blue-black staining. Steel wool and wire brushes are the usual source, which is reason enough to keep both away from oak.
End grain is the weak point regardless of species. FPL notes it absorbs moisture far faster than face grain, and that finishes fail there first. Joints and edges are where that shows up on furniture.
Existing damage changes the answer entirely. A scratch through the film puts timber back at the surface, and the species properties the finish was masking become the ones that matter.
Construction sets the repair ceiling. A thin veneer cannot be sanded back, and a soft species dents where a harder one resists. Those differences survive any finish.
Treat the finish as the first question and the timber as the second—neither one answers on its own.
The Water Drop Test

Start with what you already have. The product page, assembly instructions, or care card usually name the finish, and a manufacturer will answer an email about a piece still in production.
A conservator or furniture restorer is the next step for anything old, inherited, or valuable. They identify finishes without testing on the piece, and asking costs less than marking a surface that cannot be redone.
The water drop test tells you less than it appears to. Beading means a film sits on the surface. Soaking in means it does not. Neither result names the finish, and what you can safely clean or repair with depends on which finish it is.
It also carries a real risk. Water on an unsealed or oiled surface leaves a mark, which makes the test most damaging exactly where the answer would be most useful. A worn film finish can bloom or lift.
If you test anyway, pick a spot that is genuinely hidden underneath, near a rear corner, behind a leg. Use the smallest drop you can place, and dry it the moment you have your answer rather than waiting out a set time.
Do not test an antique, a piece with visible wear, or anything you would be upset to mark. Those are the cases for a professional opinion.
- Beads up and sits there. The piece is sealed, and damp cleaning is fine
- Soaks in and goes dark. That surface is bare, oiled, or worn through, so keep liquid off it
- Goes white or cloudy. The finish is wearing thin. Dry it right away and stick to dusting
How Far Each Finish Will Let You Go

|
Finish |
Telltale sign |
Damp cloth OK? |
Never use |
|
Polyurethane or varnish |
Hard, faintly plastic feel. Water beads up |
Yes, wrung out well |
Steam, soaking, abrasives |
|
Lacquer |
Thin and very smooth. Common on factory pieces |
Yes, barely damp |
Alcohol, acetone, strong solvents |
|
Shellac |
Older pieces, warm amber tone. Alcohol softens it |
Barely, and dry it instantly |
Alcohol of any kind, hot water |
|
Wax |
Soft sheen, fingernail leaves a faint mark |
No, dust only |
Detergents, solvents, water |
|
Oil |
Matte, feels like wood, not coating, absorbs water |
Barely, then dry |
Soaking, soap buildup |
|
Laminate |
Repeating grain pattern, seams at edges |
Yes, most tolerant of all |
Abrasive pads, edge soaking |
|
Bare wood |
Water soaks straight in and darkens |
No, dust and vacuum only |
Water, soap, wax |
Anything old or handed down deserves a second opinion. State conservation programs put out care guidance for wooden objects and furniture that runs deeper than any cleaning blog.
Supplies to Gather
- Two or three clean microfiber cloths. Keep the washing cloth and the drying cloth separate.
- A small bowl of warm water
- Mild dish soap. A few drops, not a squirt
- Cotton swabs and a soft brush for grooves
- A dry cloth already in your hand. Drying speed matters here more than anything else
Cleaning Wood Furniture Step by Step
1. Clear and Dry Dust First

Take everything off the top. Dry microfiber first, before any moisture shows up. Damp dust turns into grit, and grit scratches.
2. Try Plain Water
Wring a cloth until it feels barely damp. Wipe a small area with the grain. Most everyday marks come off with nothing else.
3. Add Soap Only If Water Fails

Fingerprints and kitchen grease come off with a few drops of mild dish soap in warm water. Apply the solution to the cloth, neverdirectly to the furniture. Sprayed droplets run into seams and joints you can't dry out.
4. Work in Small Sections

One panel at a time. One drawer front at a time. Dining tops cop the worst of it, so they gain most from working small. A round family dining table picks up food acid, condensation rings, and hand oil in roughly equal measure.
5. Rinse the Soap Off
Second cloth over the same patch, wrung out in plain water. Leave the soap film behind; it pulls in dust and flattens the sheen within a few weeks.
6. Dry Immediately

Dry it immediately. Edges, joints, and the area around hardware need the most attention, since those are where water finds a way in.
How long it takes to do damage depends on the piece. An intact film finish can shed a spill that sits for a while. A worn or cracked one lets water reach the substrate almost at once. Oiled and unsealed surfaces absorb rather than resist.
The construction underneath matters as much. A reconstituted core swells quickly once water passes an unsealed edge, and that swelling does not reverse. Solid wood tolerates more and can usually be refinished.
Waiting is what turns a spill into a repair. Because you cannot tell from a quick look which case you have, treat every spill as the fast one.
Blot rather than wipe. Wiping spreads liquid into the joint you are trying to protect. Press a dry cloth down, lift, and repeat with a fresh part of the cloth.
Check the same spots again an hour later. Water tracks into a joint and reappears at the edge, and a second dry pass catches what the first one missed.
Follow the manufacturer's care guidance for anything beyond a wipe. Cleaners and conditioners vary by finish, and the wrong one does its own damage.
How to Remove Years of Grime
Old furniture carries layers. Dust. Hand oil. Cooking residue. Decades of polish stacked on top. Gentle and repeated wins over strong and fast every time.
Repeat, Do Not Escalate
Three passes with mild soap will shift more than one pass with something aggressive. Rinse and dry between passes so you are not just moving grime around.
Grime, or a Finish Giving Up?
If it stays sticky, gummy, or cloudy after a clean, it was never dirty. Old wax breaking down. Shellac past its life. Silicone polish. Scrubbing will not touch any of them.
The Spots Hands Keep Touching

Hand oil builds on drawer pulls, chair arms, table edges, and desk fronts long before it shows on a flat top. A desk with three drawers wants the pull area cleaned far more often than the surface above it.
Pressure Will Not Help
Abrasive pads and stiff brushes remove the finish before they remove the dirt. On a coated surface, leaning harder never solves anything.
Getting Into Grooves, Flutes and Carving

Dust settles into recesses, and a normal wipe just packs it in harder. A fluted round coffee table shows this well. Every groove is a trap.
First, loosen it with a soft brush. Next, use a cotton swab barely damp with soapy water, working one groove at a time. Dry by pushing a corner of cloth down into the recess.
Veneer, Laminate and Engineered Wood

Most furniture sold today is not solid timber at all. Most other guides on this topic skip right past that.
Veneer
A very thin sheet of real wood laid over a core. The face cleans normally. Edges and seams are where you keep liquid away. Water that creeps underneath lifts the veneer, and you can't clean out failed glue.
Laminate
Laminate is a printed layer over a core, with no pores in the surface itself. The routine cleaning is simple. What it tolerates beyond that varies by product.
Use a damp cloth, mild soap, and dry it off. Skip abrasive pads and scouring powders, since the print sits under a thin wear layer and scratching through it permanently breaks the pattern.
Edges and seams are where water gets in. A chipped edge band or an open seam lets moisture reach the core, and a swollen core does not come back. Dry those areas first and check them when you clean.
Heat is the failure people do not expect. Adhesive bonds soften, and a hot pan or a laptop vent running against the surface can lift the laminate from the substrate. Use a trivet rather than testing it.
Standing water is the other one. A puddle left against a seam overnight does more than the same water wiped off a solid surface, because the damage happens underneath where you cannot see it starting.
Grades differ more than the look suggests. A thick high-pressure laminate on a quality core behaves nothing like a thin printed foil on particleboard. The manufacturer's care sheet is the only thing that tells you which you have.
Repair is the real limit. A scratch through the print layer cannot be sanded out or refinished, which is the trade you make for the easy cleaning.
Engineered Board Edges
Cut edges drink water and swell for good. Dry them fast. Wood behaves predictably around moisture, and a swollen board is one of the few kinds of damage with no way back.
Wood in Bathrooms and Kitchens
No room asks more of a finish than a bathroom or a kitchen. Steam. Splashes. Humidity that climbs and drops twice a day.
Wipe It the Day It Gets Wet

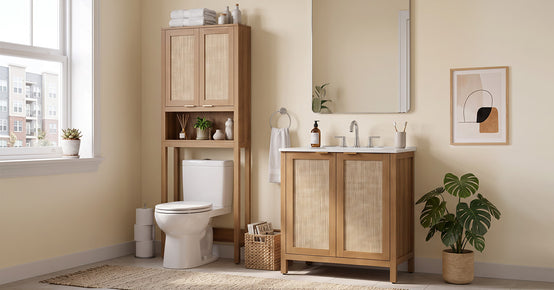
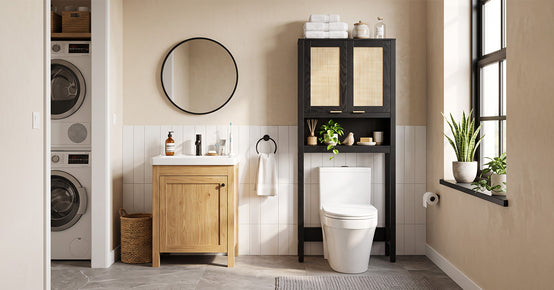
Wipe wet-room surfaces the day they get wet, not at the weekend. A bathroom vanity cabinet with a sink takes splashing around the basin edge every single day. That edge is where finishes give out first.
Air Matters More Than Product

An extractor fan does more for wood than anything in a bottle. Pieces built for damp rooms tend to carry a tougher factory finish. Worth comparing the bathroom storage range before you move a bedroom piece into a wet room.
Things That Will Cost You a Finish

Plenty of popular advice does real damage. These are the ones worth arguing with.
- Silicone sprays and aerosol polish. Conservation guidance is blunt here. They build up, pull in dust, go gummy, and make any future refinishing a nightmare.
- Denatured or rubbing alcohol is constantly recommended for water marks. It dissolves shellac and softens lacquer. The mark goes and so does the finish.
- Hydrogen peroxide bleaches the wood instead of cleaning it. That pale patch is permanent.
- Baking soda is mildly abrasive. Fine scratches, dulled sheen, worst of all on gloss
- Neat vinegar is acidic enough to etch some finishes if you keep using it
- Olive oil and any other food oil. They oxidize, turn sticky, then rancid, collecting dust the whole way
- Steam cleaners and dripping cloths. Heat plus moisture swells wood, softens glue, and clouds finishes
- Spraying anything straight onto the surface. The droplets end up somewhere you cannot reach to dry
Polish, Wax or Oil?
Cleaning is one job. Protecting is another. Sealed furniture does not need feeding every time you wipe it.
Most Pieces Need None of It
A modern lacquered or polyurethane top is sealed already. Dust it, damp-clean it now and then, and that is the entire routine.
Paste Wax, and Not Much of It

Wax suits stable clear finishes and adds a thin protective layer. National Park Service guidance on waxing furniture and wooden objects warns against applying it to bare wood, where it soaks into the pores and cannot be removed.
Apply a thin coat and buff it out, once or twice a year at most. More product is not better protection.
Oil Only on Oiled Pieces
Furniture oil belongs on furniture already finished with oil. Applied over varnish or lacquer, it just sits there. Tacky, dust-collecting, hard to remove.
When to Stop and Ask Someone
Some pieces should not be a learning project. Get a conservator to look before you clean if the piece has any of these:
- Flaking, lifting, or crazed finish
- Loose or bubbling veneer
- Painted decoration, gilding or inlay
- Real antique value or family provenance
- A previous repair you cannot identify
Cleaning is easy to attempt and expensive to undo.
Protecting Wood Between Cleans
Prevention cuts down on the cleaning you have to do, which is the safest option of all.
Coasters, Mats and Trivets

Condensation rings and hot dishes cause more finish damage than dirt ever will. Dining surfaces take the brunt, so check what the dining room range is finished with before deciding how careful you need to be.
Keep It Out of Direct Sun
UV fades finishes and lightens wood in patches. Leave a piece half in the sun, and the line shows within a year.
Keep an Eye on Humidity
Big swings push wood to shrink and swell. Joints work loose. Panels crack. Veneer lifts. Steady indoor humidity does more for furniture than any polish ever will.
Final Takeaway
Work out the finish. Dust before you dampen. Reach for the mildest thing that does the job, put it on the cloth instead of the furniture, then dry straight away.
That covers nearly every piece of wood furniture in a normal house. Anything it doesn't cover is a repair job, not a cleaning one.
FAQs
How do you remove years of grime from wood furniture?
Work in small sections with a barely damp cloth and a few drops of mild dish soap. Rinse and dry each one before you move along.
Run the same gentle pass several times over instead of reaching for something stronger. If a surface is still sticky at the end, it was never dirty. That is degraded polish.
What should you not clean wood with?
Keep these away:
- Silicone aerosol polish. It builds up and turns gummy
- Denatured alcohol dissolves shellac and softens lacquer
- Hydrogen peroxide and bleach both lighten the wood itself
- Baking soda, magic erasers, any abrasive pad at all
- Steam cleaners, dripping cloths, neat vinegar
Food oils stay in the kitchen. On furniture, they turn rancid and gather dust.
How should you clean wooden furniture?
Dry microfiber first. Then a cloth wrung out in plain water. Use mild dish soap only when water alone won't lift the mark.
Rinse with a second damp cloth and dry with a third straight away. Always apply everything to the cloth, never directly to the furniture.
How do you clean old wood furniture without damaging the finish?
Work out the finish first. Spot-test somewhere hidden, and let it dry completely before you go further.
Very small areas. As little moisture as possible. Dry each one immediately. Leave the patina where it is. Age-related color and soft wear add value, not dirt to scrub off.
What is the best way to clean really dirty wood?
Several gentle passes rather than one strong one. Use a mild soap solution, work in small sections, and rinse and dry between rounds. Strong cleaners strip finish faster than they lift grime, so you end up refinishing instead of cleaning.
Can I use baking soda to clean wood?
No. Baking soda is a mild abrasive. On a sealed surface, it leaves fine scratches and flattens the sheen, and gloss finishes show it worst. It also leaves an alkaline residue you then have to rinse off. Mild dish soap does the same job with none of that.
What is the best cleaner for wood furniture?
For most sealed furniture, a few drops of mild dish soap in warm water. No universal wood furniture cleaner exists. Waxed, oiled, and bare surfaces each want different handling. Whatever you pick, put it on a cloth and test it somewhere hidden first.
What is the best product to bring old wood back to life?
Start by identifying what is actually wrong. A dull surface, a dried finish, and a damaged one call for different answers, and applying the wrong one makes the next repair harder.
Check the manufacturer's care guidance before you do anything. Makers specify what their finish accepts, and a piece still in production usually has that documented.
For anything old, inherited, or valuable, a conservator or restorer is the right call. What looks like a dull finish can be a patina worth keeping, and you can't judge that from a photograph.
Wax is not a default. It leaves a residue that resists later coats, and a waxed piece usually needs that layer stripped before it can be refinished. It also changes sheen and needs redoing on a schedule.
Compatibility runs both ways. Some finishes accept wax, and some do not; waxing over a deteriorating film seals in the problem rather than fixing it.
A dried oil finish generally takes more of the same oil, though matching matters. Different oils cure differently, and layering an incompatible one gives you a soft or tacky surface.
Test any product on a hidden area first and let it cure fully before judging. Underneath, near a rear corner, somewhere nobody looks.
Reversibility is the question worth asking each time. Cleaning is reversible. Wax mostly is. A new film finish is not, and that is the point at which a professional opinion pays for itself.
Cloudy, cracked, or sticky means refinishing, not product. No restorer in a bottle fixes that.
Sources
- American Institute for Conservation – Caring for Your Treasures
- National Park Service – Conserve O Gram 7/2: Waxing Furniture and Wooden Objects
- National Park Service – Conserve O Grams: Museum and Collections Care Leaflets
- State Historical Society of Iowa – Collections Care: Wooden Objects and Furniture
- Cabinfield – Different Types of Wood for Furniture
- USDA Forest Service – Wood Handbook: Wood as an Engineering Material
- U.S. Environmental Protection Agency – Formaldehyde Emission Standards for Composite Wood Products


Looking for something else?
How to Fold Napkins: 10 Easy Ways to Dress Up Any Table
LEARN MORE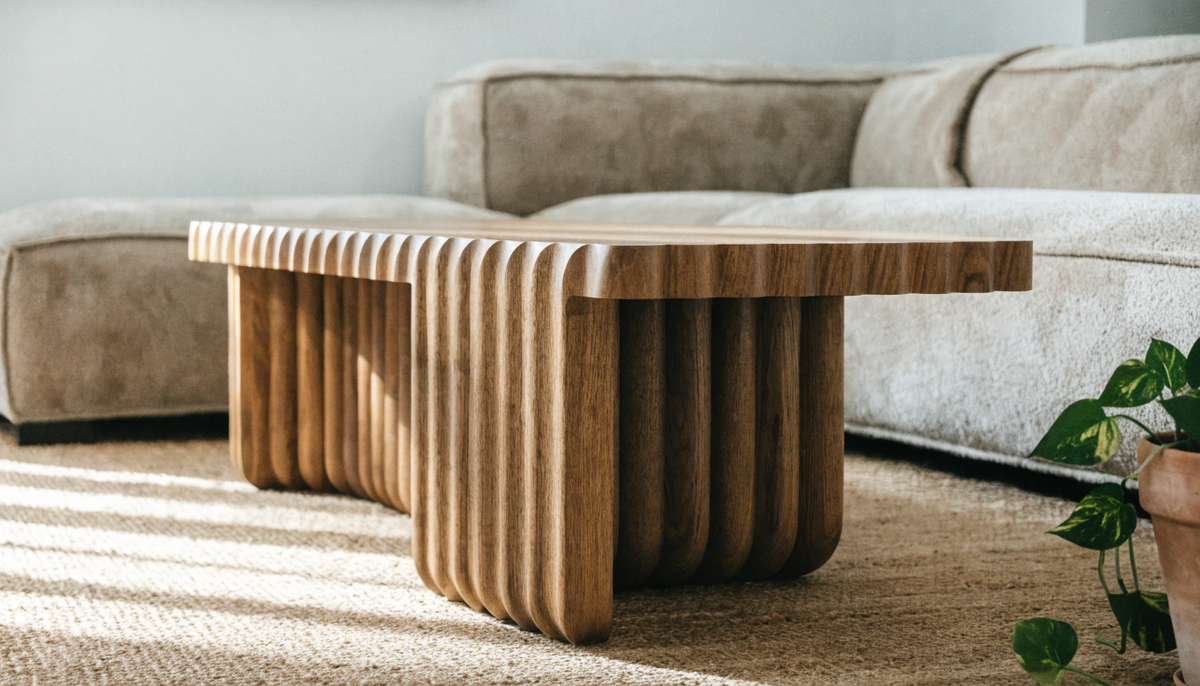
How to Choose a Coffee Table: The Complete Buying Guide
LEARN MORE
Burl Wood Furniture: The Complete Buying Guide
LEARN MORE
What Is a Hope Chest? Meaning, History, and Modern Uses
LEARN MORELooking for something else?

What Is a Foyer? Meaning, Purpose and Design Guide
LEARN MORE
GREENGUARD Gold Certified Furniture: What It Really Means for Your Home
LEARN MORE
How to Clean a Mirror Without Streaks: Simple Step-by-Step Guide
LEARN MORE


Further reading

Furniture Distance From a Fireplace: How Far Is Safe?
How to Clean Wood Furniture and Keep the Finish Intact


