


How to Make a Nightstand: Easy DIY Bedside Table Guide


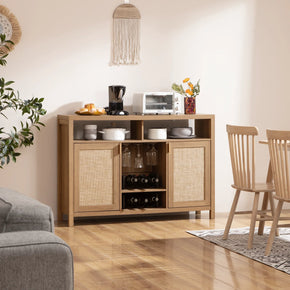
Building furniture from scratch feels deeply satisfying—and a nightstand is the perfect beginner’s project. It’s compact, functional, and endlessly customizable. Whether you’re after a rustic wood look, a sleek modern shape, or a space-saving wall-mounted version, this step-by-step guide will show you how to make a nightstand that suits your space and style.
We’ll cover both simple open-shelf builds and how to make a nightstand taller if yours sits too low, plus a section on how to make a floating nightstand for minimalist rooms. The goal is a beautiful, sturdy bedside table that looks professionally made and fits comfortably next to your bed.
If you’d like ready inspiration or finished options, you can explore the nightstand for classic, modern, and Scandinavian-inspired pieces.
Step 1: Plan the Design and Get Your Measurements

Before sawing or gluing, decide what type of nightstand fits your needs. Ask yourself:
- Do you want open storage, a drawer, or both?
- Will it stand on legs or mount to the wall?
- Does it need to match your bed height or slightly exceed it?
Ideal height and dimensions
A good nightstand height equals your mattress top or sits about 1–2 inches above. Most people find 24–28 inches tall works perfectly.
Standard nightstand dimensions:
- Height: 24–28 inches
- Width: 18–24 inches
- Depth: 14–18 inches
Sketch the design on paper or use a free design app to visualize proportions.
Step 2: Choose Your Materials
The best DIY nightstands start with stable, easy-to-work materials.
Recommended wood:
- Plywood (3/4") for affordable strength and clean cuts.
- Pine for a soft, paint-friendly finish.
- Oak, birch, or maple for natural, stain-grade projects.
Hardware & finishing supplies:
- Wood screws, nails, or pocket-hole screws.
- Wood glue for strong joints.
- Drawer slides (if adding drawers).
- Sandpaper (120, 180, 220 grit).
- Paint, stain, or clear coat.
Step 3: Cut and Prepare the Panels
Here’s a simple base design for a single-shelf nightstand:
- Two side panels: 24" x 16"
- One top panel: 24" x 18"
- One bottom panel: 24" x 16"
- One back panel: 22.5" x 18" (optional for added strength)
If you’re adding drawers, cut additional pieces for the drawer box and face (we’ll cover this later).
Check all cuts for square corners using a speed square. Smooth any rough edges with 120-grit sandpaper before assembly.
Step 4: Assemble the Frame

Lay the side panels flat and attach the bottom and top using wood glue and 1¼-inch screws. Use clamps to hold everything tight as the glue dries. Wipe off excess glue immediately—it can affect stain absorption later.
To keep the box square, add a back panel or diagonal brace. Once secure, your nightstand will stand firm and stable.
Step 5: Add a Shelf or Drawer
Option 1: Open shelf
For a simple version, add a shelf halfway up the nightstand body. This gives space for baskets, books, or décor. Glue and screw through the sides to hold it in place.
Option 2: Drawer
If you want storage, here’s how to make a nightstand with a drawer:
- Measure the inside width between your nightstand’s side panels.
- Subtract 1 inch (½" clearance for each side) to determine drawer width.
- Cut drawer sides, front, back, and bottom accordingly.
- Assemble the drawer box using glue and screws.
- Install full-extension drawer slides flush with the bottom edge of the opening.
- Mount the drawer front so it sits flush with the frame.
For two drawers, repeat the process—install slides for each drawer with a spacer to maintain even gaps. This is how to make a nightstand with drawers without professional cabinetry tools.
Step 6: Build the Base or Add Legs
You can give your nightstand personality with the right base:
- Wooden legs (6–8 inches tall) for a mid-century feel.
- Metal hairpin legs for industrial modern style.
- Box plinth base for minimalist stability.
- Floating mount for small rooms (see next section).
Check that the table sits level; uneven bases lead to wobbly drawers and misalignment.
Step 7: How to Make a Nightstand Taller
If your table sits too low beside the bed, don’t rebuild—just raise it safely.
Here’s how to make a nightstand taller:
- Add new legs. Unscrew short legs and replace them with taller ones from a hardware store or online.
- Use riser blocks. Cut matching wood cubes or use pre-made furniture risers for a subtle lift.
- Install a base platform. Create a simple plinth under the nightstand using 1x4 boards or plywood, painted to match the piece.
- Stack trim or molding. For solid nightstands, add an inch or two of decorative molding around the bottom to raise the overall height.
Always keep proportions balanced—the nightstand top should sit roughly even with your mattress for the most comfortable use.
Step 8: How to Make a Floating Nightstand
Floating nightstands are popular for minimalist interiors and tight bedrooms. They save floor space and look sleek beside upholstered or platform beds.
Here’s how to make a floating nightstand:
- Plan size. Aim for 16–20 inches wide and 10–14 inches deep.
- Build a small box. Use ¾" plywood or solid wood for the top, sides, and bottom. Leave the back open.
- Mount a French cleat. Cut two identical 3-inch-wide strips at a 45° angle along their long edge. Attach one piece to the wall (angled up) and one to the back of the nightstand (angled down).
- Attach the nightstand. Lift and hook the wall-mounted cleat into the nightstand cleat.
- Check alignment. Use a level to make sure the top is parallel to your mattress.
This technique works equally well for drawers—just ensure slides and mounting brackets are securely installed.
Step 9: Sand and Finish
Start with 120-grit sandpaper to remove roughness, move to 180-grit, then finish with 220-grit for a smooth touch.
For a natural wood look, apply stain evenly with a soft cloth and seal with polyurethane or clear lacquer. For paint, start with a primer coat and follow with two layers of high-quality paint.
Matte finishes highlight texture; glossy finishes reflect light and make small rooms feel larger. Choose based on your bedroom lighting and décor.
Step 10: Add the Final Details

Hardware transforms a simple nightstand into a statement piece. Choose knobs or pulls that complement your bedroom’s metal accents—brass for warmth, black matte for modern contrast, chrome for sleek minimalism.
If you’re building for function, consider adding:
- Integrated cable holes for chargers or lamps.
- Drawer dividers for jewelry or remotes.
- Soft-close slides for a premium feel.
Add felt pads beneath legs (or wall bumpers for floating units) to protect surfaces and ensure silence when opening drawers.
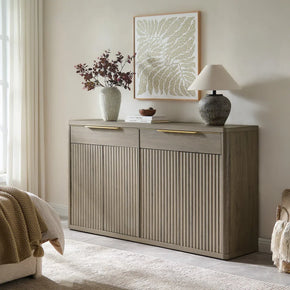
Design Variations to Try
Rustic farmhouse: Use reclaimed wood and whitewash stain. Add cross-brace details for charm.
Mid-century modern: Keep clean edges, tapered legs, and walnut or oak veneer.
Scandinavian minimalist: Light wood tone, rounded edges, matte finish, and a single drawer with no visible handle.
Contemporary industrial: Combine black metal frames with wood shelves for contrast and durability.
Each aesthetic follows the same structural logic—you just adjust materials, color, and hardware.
Troubleshooting Common DIY Issues
If your drawer sticks, check slide alignment and ensure equal spacing on both sides. Loosen screws slightly and readjust.
If the nightstand wobbles, verify that legs are equal height or floors are level. Add felt shims if needed.
Uneven stain absorption? Apply pre-stain conditioner before staining softwoods like pine. Always sand between coats for a consistent finish.
When to Build vs. When to Buy
Making your own nightstand is rewarding, but not every home setup allows for woodworking tools or space. If you lack a workshop, buying a pre-built design can save time while still offering customization through styling.
You can browse professionally built options—open-shelf, single-drawer, or floating—in the SICOTAS nightstand collection. Each model follows the same ergonomic height principles you’ve learned, so it integrates seamlessly beside your bed.
Frequently Asked Questions
How long does it take to make a nightstand?
A simple open design can be built in a single day. With drawers or a floating setup, expect a weekend project.
How much does it cost?
Between $60–120, depending on materials, hardware, and finish quality.
What’s the ideal nightstand height?
The top should align with the top of your mattress—usually 24–28 inches from the floor.
How to make a nightstand taller after building it?
Add longer legs, risers, or a subtle base frame. Always check that proportions remain consistent with the bed.
Can I make a floating nightstand with drawers?
Yes—just ensure drawer slides are securely attached and rated for wall-mounted weight.
Final Thoughts
Learning how to make a nightstand is a perfect entry into furniture craftsmanship. It blends simple geometry with endless creative options—paint, stain, hardware, and shape all reflect your personal taste.
If you love the process, build one for each side of the bed. If you’d rather skip to decorating, check out the curated designs in the nightstand —each crafted to the same comfortable height and proportion you’d build yourself.
Either way, a well-made nightstand is more than a bedside table—it’s a small act of design that improves every morning and night.


No comments


0 comments